
#11 : 답변 등록
01. 답변 등록 버튼 만들기
- question_list.html에 form, textarea, input 추가
<!DOCTYPE html>
<html xmlns="http://www.w3.org/1999/xhtml"
      xmlns:th="http://www.thymeleaf.org">
<head>
    <meta charset="UTF-8">
    <title>Title</title>
</head>
<body>
    <h1 th:text="${question.subject}"></h1>
    <div th:text="${question.content}"></div>

    <form th:action="@{|/answer/create/${question.id}|}" method="post">
        <textarea name="content" id="content" rows="15"></textarea>
        <input type="submit" value="답변등록">
    </form>
</body>
</html>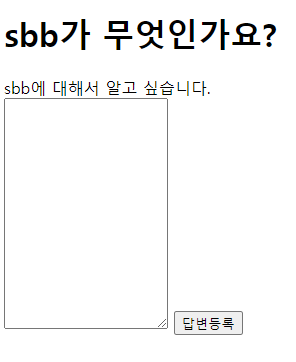
* 답변 등록을 클릭하면 포스트 방식으로 /answer/create/<질문id> URL이 호출, 아직은 404 페이지
02. 답변 컨트롤러 만들기
- AnswerController.java 생성
package com.mysite.sbb.controller;

import com.mysite.sbb.entity.Question;
import com.mysite.sbb.service.QuestionService;
import lombok.RequiredArgsConstructor;
import org.springframework.stereotype.Controller;
import org.springframework.ui.Model;
import org.springframework.web.bind.annotation.PathVariable;
import org.springframework.web.bind.annotation.PostMapping;
import org.springframework.web.bind.annotation.RequestMapping;
import org.springframework.web.bind.annotation.RequestParam;

@RequestMapping("/answer")
@RequiredArgsConstructor
@Controller
public class AnswerController {

    private final QuestionService questionService;

    @PostMapping("/create/{id}")
    public String createAnswer(
            Model model,
            @PathVariable("id") Integer id,
            @RequestParam String content){
        Question question = this.questionService.getQuestion(id);
        // todo : 답변 저장
        return String.format("redirect:/question/detail/%s",id);
    }

}* @RequestMapping으로 요청명 프리픽스 고정
* @PostMapping으로 post요청 처리 매핑
* 답변을 저장하기 위해 name이 content로 저장된 데이터를 @RequestParam으로 불러옴
* 아직 답변 저장 코드는 작성하지 않은 상태
03. 답변 저장하기
- AnswerService.java 생성
package com.mysite.sbb.service;

import com.mysite.sbb.entity.Answer;
import com.mysite.sbb.entity.Question;
import com.mysite.sbb.repository.AnswerRepository;
import lombok.RequiredArgsConstructor;
import org.springframework.stereotype.Service;

import java.time.LocalDateTime;

@RequiredArgsConstructor
@Service
public class AnswerService {
    private final AnswerRepository answerRepository;

    public void create(Question question, String content){
        Answer answer = new Answer();
        answer.setContent(content);//답변
        answer.setCreateDate(LocalDateTime.now());//시간
        answer.setQuestion(question);//질문
        this.answerRepository.save(answer);//답변 정보 저장
    }
}* 답변 생성을 위해 create 메서드 추가, question과 content를 사용해 Answer 객체 생성, 저장
- create 메서드 AnswerController.java에 추가
package com.mysite.sbb.controller;

import com.mysite.sbb.entity.Question;
import com.mysite.sbb.service.AnswerService;
import com.mysite.sbb.service.QuestionService;
import lombok.RequiredArgsConstructor;
import org.springframework.stereotype.Controller;
import org.springframework.ui.Model;
import org.springframework.web.bind.annotation.PathVariable;
import org.springframework.web.bind.annotation.PostMapping;
import org.springframework.web.bind.annotation.RequestMapping;
import org.springframework.web.bind.annotation.RequestParam;

@RequestMapping("/answer")
@RequiredArgsConstructor
@Controller
public class AnswerController {

    private final QuestionService questionService;
    private final AnswerService answerService;

    @PostMapping("/create/{id}")
    public String createAnswer(
            Model model,
            @PathVariable("id") Integer id,
            @RequestParam String content){
        Question question = this.questionService.getQuestion(id);
        this.answerService.create(question,content);
        return String.format("redirect:/question/detail/%s",id);
    }

}* 주석 삭제 후 create 메서드를 이용해 답변 저장
04. 상세 페이지에 답변 출력
- question_detail.html 수정
<!DOCTYPE html>
<html xmlns="http://www.w3.org/1999/xhtml"
      xmlns:th="http://www.thymeleaf.org">
<head>
    <meta charset="UTF-8">
    <title>Title</title>
</head>
<body>
    <h1 th:text="${question.subject}"></h1>
    <div th:text="${question.content}"></div>
    <h5 th:text="|${#lists.size(question.answerList)}개의 답변이 있습니다.|"></h5>
    <div>
        <ul>
            <li th:each="answer : ${question.answerList}" th:text="${answer.content}"></li>
        </ul>
    </div>
    <form th:action="@{|/answer/create/${question.id}|}" method="post">
        <textarea name="content" id="content" rows="15"></textarea>
        <input type="submit" value="답변등록">
    </form>
</body>
</html>
* #lists.size(이터러블객체) : 타임리프가 제공하는 유틸리티, 객체의 길이 반환
* 답변은 answerList를 순회하여 <li>엘리먼트로 표시
#12 : 스태틱 디렉토리와 스타일 시트
01. static 디렉토리
* 스타일시트 파일은 스프링부트의 static 디렉토리에 저장해야 한다.
02. 스타일 시트
- 텍스트창의 너비 100%, 답변등록 버튼 마진 10px
textarea {
    width:100%;
}

input[type=submit] {
    margin-top:10px;
}
03. 템플릿에 스타일 적용
<!DOCTYPE html>
<html xmlns="http://www.w3.org/1999/xhtml"
      xmlns:th="http://www.thymeleaf.org">
<head>
    <meta charset="UTF-8">
    <title>Title</title>
</head>
<body>
    <link rel="stylesheet" type="text/css" th:href="@{/style.css}">
    <h1 th:text="${question.subject}"></h1>
    <div th:text="${question.content}"></div>
    <h5 th:text="|${#lists.size(question.answerList)}개의 답변이 있습니다.|"></h5>
    <div>
        <ul>
            <li th:each="answer : ${question.answerList}" th:text="${answer.content}"></li>
        </ul>
    </div>
    <form th:action="@{|/answer/create/${question.id}|}" method="post">
        <textarea name="content" id="content" rows="15"></textarea>
        <input type="submit" value="답변등록">
    </form>
</body>
</html>
* static 자체가 루트 디렉토리이므로 경로 작성 시 /static/style.css가 아닌 /style.css로 작성한다.
#12 : 부트스트랩
01. 부트스트랩 설치
- 부트스트랩 다운로드 : https://getbootstrap.com/docs/5.2/getting-started/download/
- 파일 다운로드 후 압축파일 내의 bootstrap.min.css 파일을 static 폴더로 복사
02. 부트스트랩 적용
- question_lsit.html 수정
<!DOCTYPE html>
<html xmlns="http://www.w3.org/1999/xhtml"
      xmlns:th="http://www.thymeleaf.org">
<head>
    <meta charset="UTF-8">
    <title>Title</title>
</head>
<body>
    <link rel="stylesheet" type="text/css" th:href="@{/bootstrap.min.css}">
    <div class="container my-3">
    <table class="table">
        <thead class="table-dark">
            <tr>
                <th>번호</th>
                <th>제목</th>
                <th>작성일시</th>
            </tr>
        </thead>
        <tbody>
        <tr th:each="question, loop : ${qList}">
            <td th:text="${loop.count}"></td>
            <td>
                <a th:href="@{|/question/detail/${question.id}|}"
                   th:text="${question.subject}"></a>
            </td>
            <td th:text="${#temporals.format(question.createDate, 'yyyy-MM-dd HH:mm')}"></td>
        </tr>
        </tbody>
    </table>
    </div>
</body>
</html>
* 테이블 항목에 번호 추가, loop.count를 활용하여 표시
* 날짜의 형식을 지정하기 위해 #temporals.format(날짜객체, 날짜포맷) 유틸리티 사용
- question_detail.html 수정
<!DOCTYPE html>
<html xmlns="http://www.w3.org/1999/xhtml"
      xmlns:th="http://www.thymeleaf.org">
<head>
    <meta charset="UTF-8">
    <title>Title</title>
</head>
<body>
    <link rel="stylesheet" type="text/css" th:href="@{/bootstrap.min.css}">
    <div class="container my-3">
    <!--질문-->
    <h1 class="border-bottom py-2" th:text="${question.subject}"></h1>
    <div class="card my-3">
        <div class="card-body">
            <div class="card-text" style="white-space: pre-line;" th:text="${question.content}"></div>
            <div class="d-flex justify-content-end">
                <div class="badge bg-light text-dark p-2 text-start">
                    <div th:text="${#temporals.format(question.createDate, 'yyyy-MM-dd HH:mm')}"></div>
                </div>
            </div>
        </div>
    </div>
    <!--답변의 갯수 표시-->
    <h5 class="border-bottom my-3 py-2"
        th:text="|${#lists.size(question.answerList)}개의 답변이 있습니다.|"></h5>
    <!--답변 반복 시작-->
    <div class="card my-3" th:each="answer : ${question.answerList}">
        <div class="card-body">
            <div class="card-text" style="white-space:pre-line;" th:text="${answer.content}"></div>
            <div class="d-flex justify-content-end">
                <div class="badge bg-light text-dark p-2 text-start">
                    <div th:text="${#temporals.format(answer.createDate, 'yyyy-MM-dd HH:mm')}"></div>
                </div>
            </div>
        </div>
    </div>
    <!--답변 반복 끝-->
    <!--답변 작성-->
    <form class="my-3" th:action="@{|/answer/create/${question.id}|}" method="post">
        <textarea class="form-control" name="content" id="content" rows="15"></textarea>
        <input class="btn btn-primary my-2" type="submit" value="답변등록">
    </form>
    </div>
</body>
</html>
* card, card-body, card-text : card 컴포넌트 사용
* badge : badge 컴포넌트
* form-control : form 컴포넌트
* border-bottom : 아래 테두리선
* my-3 : 상하 마진값 3
* py-2 : 상하 패딩값 2
* p-2 : 상하좌우 패딩값 2
* d-flex justify-content-end : 컴포넌트 우측 정렬
* bg-linght : 연회색 배경
* text-dark : 검은색 글씨
* text-start : 좌측 정렬
* btn btn-primary : 버튼 컴포넌트
'T-I-L > [책] 요약&정리' 카테고리의 다른 글
| [점프 투 스프링부트] 3장 SBB 서비스 개발(내비게이션바, 페이징) - 2023. 08. 22. (0) | 2023.08.22 |
|---|---|
| [점프 투 스프링부트] 2장 스프링부트의 기본 요소(템플릿상속, 질문등록과폼, 공통템플릿) - 2023. 08. 21. (0) | 2023.08.21 |
| [점프 투 스프링부트] 2장 스프링부트의 기본 요소(질문상세) - 2023. 08. 17 (0) | 2023.08.17 |
| [점프 투 스프링부트] 2장 스프링부트의 기본 요소(질문목록, 템플릿, 서비스) - 2023. 08. 16 (0) | 2023.08.16 |
| [점프 투 스프링부트] 2장 스프링부트의 기본 요소(엔티티,리포지토리) - 2023. 08. 14 (0) | 2023.08.14 |